


The five highest-impact fixes for any workspace, in order, are: set your chair height so knees sit near 90 to 100 degrees, position your monitor 20 to 26 inches away with the top of the screen at eye level, align your keyboard and mouse so elbows rest near 90 degrees, add lumbar support at belt height, and build a movement plan into your day. Most neck and shoulder tension traces back to one of these five points being off. You don’t need new furniture to fix most of it. You need two minutes and this order:
- Sit back, plant feet flat, adjust seat height until knees hit roughly 90 to 100 degrees.
- Slide your chair in until lumbar support meets your lower back at belt line.
- Raise or lower your monitor until the top of the screen sits at or just below eye level.
- Push the screen back to arm’s length, about 20 to 26 inches away.
- Set a timer for a break using the 20-8-2 or 20-20-20 rule (more on both below).
Quick reference: elbow and knee angles of 90 to 100 degrees, monitor distance of 20 to 26 inches, and a break every 20 minutes are the three numbers worth memorizing from this entire guide.
Key Takeaways
Correct chair height and monitor placement resolve most workplace neck and shoulder tension faster than any single piece of new equipment.
| Point | Details |
|---|---|
| Fix the chair first | Set knees at 90 to 100 degrees and lumbar support at belt line before adjusting anything else. |
| Match desk to elbows | Keyboard height should keep elbows at 90 to 100 degrees with wrists straight. |
| Monitor distance and height | Place the screen 20 to 26 inches away with the top at or just below eye level. |
| Move on a schedule | Use the 20-8-2 sit-stand cycle and the 20-20-20 eye rule to break up static posture. |
| Audit weekly | Run the yes/no self-assessment; two or more “no” answers means fix the chair and monitor first. |
Table of Contents
- Ergonomic Desk Setup Checklist Step 1: Get Your Chair Right First
- Match Your Desk Height to Your Newly Adjusted Chair
- Set Your Monitor Height, Distance, and Tilt
- Place Your Peripherals Where Your Arms Already Rest
- Control Lighting and Clear the Desk Layout
- How Often Should You Move During the Workday?
- Run This Self-Assessment Checklist Right Now
- Match Your Symptoms to the Setup Problem Causing Them
- What to Look for in a Chair Beyond Basic Adjustability
- Temperature and Noise Shape How Long Good Posture Lasts
- Manage Cables and Clutter to Cut Down on Awkward Reaches
- Why Chair-First Beats the Usual Monitor-First Advice
- Frequently Asked Questions
- Sources
Ergonomic Desk Setup Checklist Step 1: Get Your Chair Right First
Fixing your chair before touching anything else matters because every other measurement on this list, from monitor height to elbow angle, is calculated relative to how you’re sitting. Change the chair later and you undo the rest.
- Set seat height. Feet flat on the floor, thighs parallel to the ground or angled slightly downward, knees at 90 to 100 degrees.
- Check seat depth. You want a two to three finger gap between the back of your knees and the seat edge. Too deep, and the edge digs into your calves; too shallow, and your thighs lose support.
- Position lumbar support at belt line, not higher. This is the single most skipped adjustment on office chairs, according to Stanford’s ergonomics guidance.
- Set backrest angle between 100 and 110 degrees. Reclining slightly past vertical reduces pressure on spinal discs compared to sitting bolt upright.
If your chair doesn’t adjust, don’t buy a new one yet. A firm cushion raises seat height, a rolled towel behind the lower back substitutes for lumbar support, and a stack of books under your feet closes the gap if your knees sit too high.
Pro Tip: Sit down, close your eyes, and notice where your body first complains. That’s usually your chair talking, not your monitor.
Match Your Desk Height to Your Newly Adjusted Chair
Once your chair is right, your desk and keyboard need to meet your arms, not the other way around. Rest your arms at your sides and check where your elbows naturally bend: that height is where your keyboard belongs.
- Set desk or keyboard tray height so elbows sit at 90 to 100 degrees, matching the angle you already dialed in on the chair.
- Center the keyboard directly in front of you, not off to one side, so wrists stay straight instead of angling outward.
- Keep the keyboard flat or tilted slightly away from you (negative tilt). A forward tilt forces wrists to bend upward, which is a common cause of tingling and numbness.
- Place the mouse immediately beside the keyboard at the same height, no reaching required.
- If your desk is fixed and too tall, add a keyboard tray, or lower your chair and add a footrest to compensate.
Getting this step wrong is the quiet cause of a lot of wrist and forearm pain that people blame on typing volume instead of typing angle.
Set Your Monitor Height, Distance, and Tilt
Your monitor is the piece most people eyeball instead of measure, and it’s also the biggest driver of forward head posture, the slouch where your chin pokes toward the screen.
- Top of the screen should sit at or slightly below eye level, so your eyes naturally land on the top third of the display without tilting your chin up.
- Distance should be roughly 20 to 26 inches, about an arm’s length. Larger monitors need more distance, not less.
- Tilt the screen back 10 to 20 degrees to reduce glare and keep your neck from craning forward.
- Laptop users need a riser plus an external keyboard and mouse. Without them, you’re either hunching down to see the screen or reaching awkwardly to type, sometimes both.
One number worth remembering: a monitor set even two inches too low forces your neck into extension for hours a day, which compounds into the tension people mistake for a bad night’s sleep.
If you wear progressive or multifocal lenses, standard advice doesn’t quite apply to you. Stanford’s ergonomics guidance recommends setting the monitor a bit lower than eye level and tilting it back slightly more, since reading through the lower lens segment otherwise means tipping your head back repeatedly through the day.
Place Your Peripherals Where Your Arms Already Rest
Your mouse, keyboard, and the smaller accessories around them either support the position you just built or quietly undo it.
- Keep the mouse touching the edge of the keyboard, not several inches away where you have to extend your arm to reach it.
- If wrist pain persists after fixing angles, try a vertical mouse or a trackball. Both reduce the twisting motion (forearm pronation) that flat mice require.
- Use a footrest whenever your feet don’t rest flat on the floor after the chair is set correctly. Dangling feet load pressure onto the back of your thighs.
- Set a document holder at screen height, next to the monitor, so you’re not repeatedly rotating your neck down to a flat desk and back up.
- Wrist rests belong under your palms during pauses, not while you’re actively typing. Resting on them mid-keystroke restricts natural wrist movement.
Control Lighting and Clear the Desk Layout
Bad lighting doesn’t just strain your eyes. It also encourages you to lean forward or crane toward the screen to compensate, which drags your posture out of the alignment you just built.
- Aim for 300 to 500 lux of ambient light at desk level, roughly what a well-lit office provides.
- Position your monitor perpendicular to windows, not facing or backing onto them, to cut glare and reflections.
- Add a bias light, a soft light strip behind the monitor, to reduce the contrast between a bright screen and a dark room.
- Keep items you reach for often, phone, notebook, coffee, within forearm’s length. Anything farther invites a twisting reach that undoes good chair posture in seconds.
How Often Should You Move During the Workday?
No posture, even a perfectly measured one, is meant to be held for hours. Stanford’s postural awareness research frames the point simply: the best posture is your next posture, not a fixed position you lock into.
- Try the 20-8-2 cycle: 20 minutes sitting, 8 minutes standing, 2 minutes walking or stretching, repeated through the day if you use a sit-stand desk.
- No standing desk? Stand and move for two to three minutes every 30 to 60 minutes instead. The goal is variability in loading on your spine, not marathon standing sessions.
- Pair movement with the 20-20-20 rule for your eyes: every 20 minutes, look at something 20 feet away for 20 seconds, following OSHA’s guidance on break timing.
- Attach movement to existing habits: stand at the end of every video call, stretch after sending an email, walk while taking phone calls.
Pro Tip: Set your break timer to the sound your phone uses for texts. You’ll actually notice it instead of tuning it out like a generic alarm.
Run This Self-Assessment Checklist Right Now
A five-minute audit catches most of what silently causes stiffness by Friday afternoon. Answer yes or no to each line.
| Check | Question |
|---|---|
| Chair | Do your knees sit at 90 to 100 degrees with feet flat? |
| Lumbar | Does your lower back touch support at belt height? |
| Desk/keyboard | Are your elbows at 90 to 100 degrees while typing? |
| Monitor | Is the top of your screen at or below eye level, 20 to 26 inches away? |
| Lighting | Is your screen free of glare from windows or overhead lights? |
| Movement | Have you stood or stretched in the last 30 to 60 minutes? |
Zero or one “no” answer means your setup is solid. Two or more means stop and fix the chair and monitor rows first. Those two account for most of the strain people report.
Five-minute reset order: chair height, then seat depth and lumbar, then desk/keyboard height, then monitor height and distance, then a break timer. Save this list as a reference guide so you can rerun it monthly.
Match Your Symptoms to the Setup Problem Causing Them
Your body usually tells you exactly which measurement is off, if you know what to listen for.
- Neck pain or stiffness almost always traces back to a monitor set too low or too far, forcing your chin forward for hours. Raise the screen to eye level first.
- Shoulder tension typically means your keyboard sits too high or too far away, so you’re shrugging to reach it. Lower the desk or keyboard tray.
- Wrist pain or tingling points to a keyboard tilted the wrong way or a mouse positioned too far from the keyboard’s edge. Flatten the keyboard and close the gap.
- Eye strain or headaches are frequently a lighting problem, not a screen problem: glare, low ambient light, or a monitor angled to catch window reflections.
Temporary fixes, cushions, rolled towels, stacked books, are fine for weeks, not years. If pain persists after two to three weeks of consistent adjustments, that’s a signal worth taking to a professional rather than another towel. A chiropractic evaluation can rule out a structural issue a checklist can’t fix on its own.
Pro Tip: Track which symptom shows up first each day. It’s the fastest diagnostic tool you have, and it’s free.
What to Look for in a Chair Beyond Basic Adjustability
Adjustability gets most of the attention, but the materials and mechanics underneath your chair matter just as much over an eight-hour day.
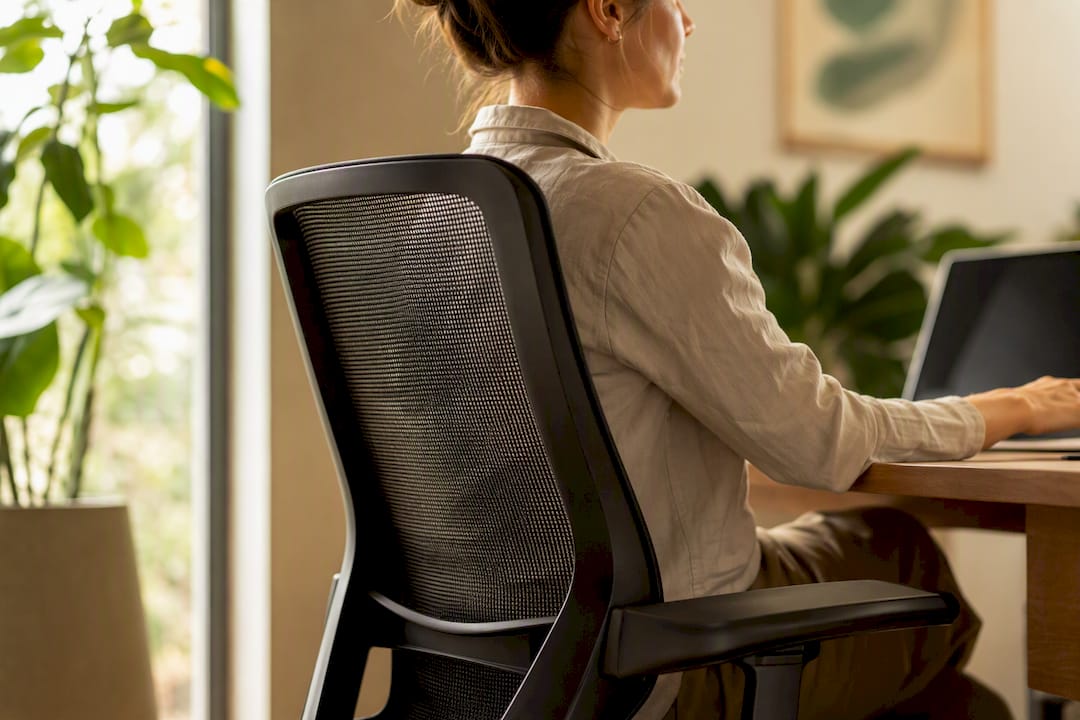
Mesh backs breathe better than foam, which matters if your home office runs warm or you tend to run hot while working. Foam-backed chairs trap heat against your spine, and that heat buildup often gets misread as fatigue when it’s really just temperature discomfort.
Swivel range lets you rotate toward a printer, a second monitor, or a colleague without twisting your spine while seated. A chair that swivels smoothly reduces the small repetitive torque that stiff, fixed-base chairs put on your lower back.
Casters matched to your floor prevent the subtle instability that comes from wheels sliding or catching. Hard casters work on carpet; soft rubber casters are built for hardwood or tile. Using the wrong pair means your chair shifts slightly every time you push off it, which forces small stabilizing movements that add up over a workday.
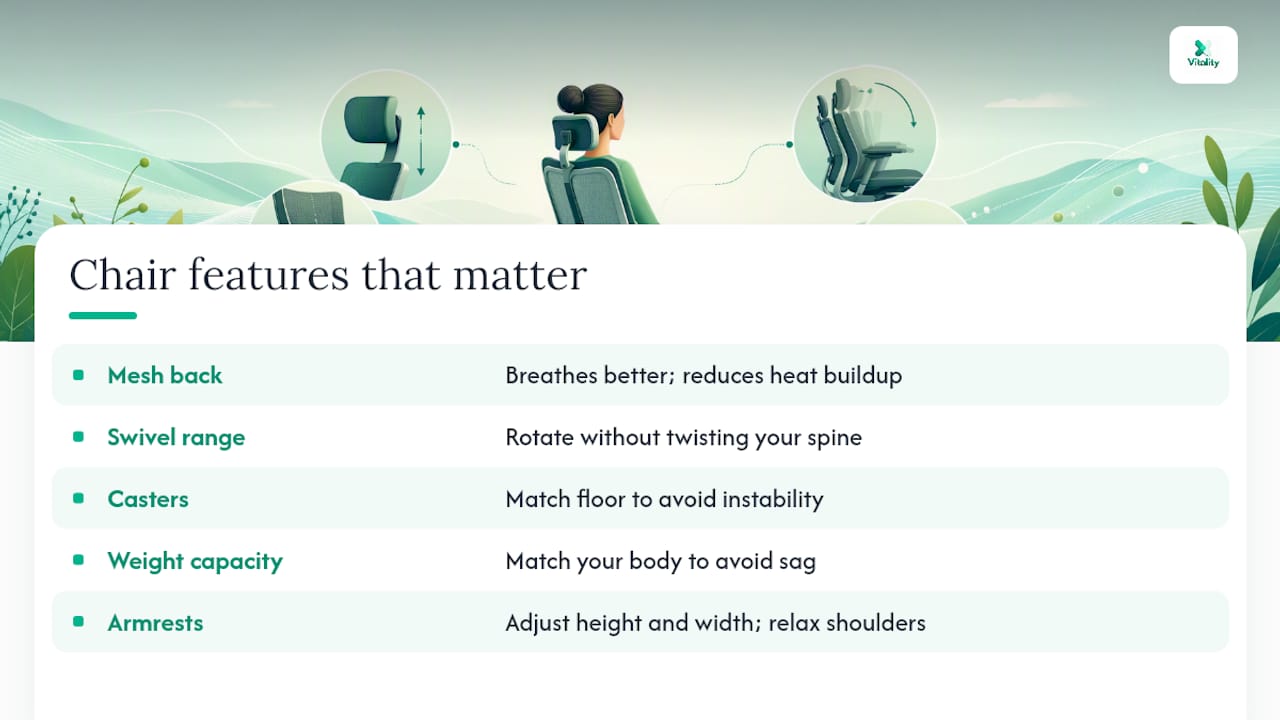
Weight capacity and seat width need to match your body, not just fit a general size chart. A seat that’s too narrow narrows your leg position and pushes knees inward; a chair rated below your body weight will sag out of proper support faster than the adjustability specs suggest it should.
Armrests, when present, should adjust in height and width so your shoulders stay relaxed rather than hiked up or splayed out. Fixed armrests set at the wrong height do more harm than no armrests at all, since they force one shoulder posture for hours regardless of what your task requires.
None of these features replace correct adjustment. They extend how comfortable that correct adjustment feels over a full day.
Temperature and Noise Shape How Long Good Posture Lasts
A perfectly measured desk still fails if the room around it works against you. Comfort has an environmental floor, and most people never test whether they’ve cleared it.
Room temperature between roughly 68 and 76 degrees Fahrenheit tends to support sustained focus. Colder rooms encourage people to tense their shoulders and hunch, an unconscious response to feeling cold that undoes careful chair and desk adjustments within minutes. Warmer rooms push people to slouch into whatever position feels coolest, usually not the neutral one you built.
Noise control matters more for posture than most people expect. Persistent background noise, a rattling fan, street traffic, an open-plan office, raises muscle tension in the neck and shoulders even when you’re not consciously reacting to it. If you can’t control the source, a white noise machine or noise-canceling headphones reduce that low-grade tension load over a full workday.
Airflow without a direct draft on your neck or shoulders prevents the reflexive muscle guarding people do against a draft, often without realizing that’s what’s causing the tightness. Position your desk so vents or fans don’t blow directly across your upper back.
None of this shows up on a typical desk checklist, but it explains why two people with identically measured setups can report very different comfort levels by the end of the day.
Manage Cables and Clutter to Cut Down on Awkward Reaches
A cluttered desk doesn’t just look messy. It actively pulls your body out of the position you spent time setting up, one small reach and twist at a time.
Loose cables snaking across your desk create two problems: they invite your foot to catch and shift your seated position, and they tempt you to route a charger or mouse cable around clutter in a way that pulls the device off its ideal placement. Route power and USB cables along the back edge of the desk or through a cable tray, so nothing crosses your direct workspace.
Keep your desktop cleared to what you touch in a given hour. Papers, extra devices, and decorative items belong on shelving or in drawers, not spread across the surface where they force you to work around them. Every item within reach should be there because you use it, not because it landed there and stayed.
A desk organizer or small tray for pens, notepads, and cables keeps small items from drifting into your keyboard’s space, which is a common trigger for the slight rightward or leftward lean people develop without noticing. Cable clips under the desk edge, a labeled power strip, and a single charging spot for phones go a long way toward a workspace that stays organized without daily upkeep.
The payoff isn’t cosmetic. A clear, organized desk means every reach you make during the day is a short, neutral one instead of a stretch around something in the way.
Neck strain from a bad setup doesn’t always resolve with furniture adjustments alone. My Vitality’s MagicPro 2.0 combines electrical muscle stimulation, heat, and massage in a 15 minute daily session, designed for people who’ve fixed their desk but still carry tension from months of poor positioning. It’s built to use at your desk, at home, or between meetings, without requiring you to leave your workspace to get relief.
Why Chair-First Beats the Usual Monitor-First Advice
Most desk setup guides lead with monitor height because it’s the easiest fix to photograph and explain. That ordering is backward. Your chair determines your elbow height, and your elbow height determines where your keyboard and monitor should sit relative to your eyes. Fix the monitor before the chair, and you’ll likely readjust it again within a week once your seat height changes.
The self-assessment score matters more than any single measurement on this list. People don’t fail at ergonomics because they don’t know the numbers. They fail because they never check their setup against those numbers after the first week, when a new chair or a borrowed laptop stand quietly drifts out of alignment. A five-minute monthly audit catches more problems than a one-time perfect setup ever will.
If there’s one piece of conventional advice worth pushing back on, it’s the idea that a single “correct” posture exists and your job is to hold it. The research on movement variability says otherwise: your spine tolerates change far better than it tolerates stillness, even good stillness. Prioritize the chair, trust the numbers over your instincts, and build movement into your calendar the same way you’d schedule a meeting.
Frequently Asked Questions
What is the correct desk height for an ergonomic setup? Desk height should let your elbows rest at 90 to 100 degrees while typing, which usually falls between 28 and 30 inches for most adults, though it depends entirely on your chair height, not a fixed number.
How far should my monitor be from my eyes? Roughly 20 to 26 inches, about an arm’s length, with the top of the screen at or slightly below eye level.
What is the 20-20-20 rule? Every 20 minutes, look at something 20 feet away for 20 seconds to reduce digital eye strain from prolonged screen focus.
Do I need an ergonomic chair, or can I fix a regular one? A regular chair works if you can add lumbar support with a cushion or rolled towel and adjust the seat height with a firm cushion. Full adjustability helps, but correct positioning matters more than the chair’s price tag.
How often should I take a break from sitting? Follow the 20-8-2 cycle if you have a sit-stand desk, or stand and move for two to three minutes every 30 to 60 minutes if you don’t.